Speed is key
Perfecting the BUILD rapid prototyping experience
Most of the business experts and their customers communicated their early designs through hand drawings. As a result, they ended up with a cluster of sketches on paper and whiteboards.
Working at BUILD, I had the opportunity to improve the rapid prototyping experience, which could shorten business experts’ early iteration process, extend the early feedback they received from users, ensure they are addressing the right needs and requirements, and potentially save the money they waste in product development.
My role
I was the design owner who planned, designed and oversaw the project while being in charge of the related research, and while collaborating closely with PMs and developers to deliver the experience.

+ Learn more about BUILD
BACKGROUND
What is BUILD
SAP BUILD is a complete set of cloud-based tools for business experts to build SAP Fiori apps. https://www.build.me/
BUILD has turned design-thinking from an idea or a way of thinking, into a productized solution to help businesses practice design-led product development and create delightful, useful apps for their users.
Collapse
THE PROBLEM
Rapid prototyping using images in BUILD was not rapid
Rapid prototyping allows users to upload images—most likely the pictures they took after the whiteboard sketching—and create hotspots to make it clickable. Although BUILD supported image prototyping, the features were very much hidden and the interface was not intuitive. Many of our users did not even know this feature existed. Even power users complained about the complexity.
THE COMPARISON
Before vs. After
Upload images
Before:
Upload one image at a time

After:
Upload all images together
Create hotspot

Before:
Need three steps to create one hotspot

After:
Draw as many hotspots as you want easily
Define navigation

Before:
Define navigation by three dropdown lists

After:
Simply click the target page
EARLY EXPLORATION
Should we introduce a brand new tool in BUILD?
The first hypothesis was that the original rapid prototyping feature in BUILD was too deeply embedded in the hi-fidelity prototyping tool, rendering the discovery of the function a huge issue, and the interactions were compromised. My first instinct was to make a separate rapid prototyping tool in BUILD. So I made the first version of exploration and tested the sketches.

To my surprise, users wanted the opposite.
For business experts, they didn’t want to rapidly create a prototype using their images only. They needed to combine their images with other hi-fidelity prototype pages as well. Separating those two prototyping tools did not match their expectations.
Then how could we help users to create image prototypes quickly and efficiently while integrated with our existing prototyping tool?
DEFINE USER FLOW
Revise design direction
So I returned to the hand sketching and asked myself what the problems were that we were trying to solve here? I decided to focus on image uploading, navigation defining, and connection verification first. Those are the basics and the most needed features for rapid prototyping.
Based on the previous usability testing, it was clear that:
-
There was no clear indication to let users upload images.
-
BUILD doesn’t allow users to draw hotspots.
-
Defining navigation was cumbersome.
After several iterations, I decided to make the use of the page map area to provide a workspace for users to define navigations and get a birds-eye view of their prototype. Users could also add other hi-fidelity pages to combine with their images.
Then I proposed a new flow.

Users could also change the navigation and reorder the pages.


USABILITY TESTING
This worked!
I led a usability testing for the design, and the results were positive. Users know how to drag and drop images to create pages. The hotspot drawing and navigation defining process were smooth.
However, I also learned that:
Problem 1. Users didn’t know how to rearrange pages. Participants expected to be able to drag and drop one page in between other pages instead of dumping it on another page.
Problem 2. Zoom was not smooth. When participants zoomed, Build sometimes focused on white space that didn’t have any content.
Problem 3. Users asked for a feature to replace, rotate and crop images.
New design iterations made improvements accordingly.
NEW DESIGN
Introducing the first stage of BUILD's new rapid prototyping tool
I worked closely with the visual designer, Diana, for the final designs.
1. Uploading images? Should be quick!
With the new design, users perceived clear instructions for drag and drop to upload images. After uploading the images, they were able to anticipate the next step. It also helped with the first time user experience. With the BUILD mobile designed by Colin and Niamh, users could take pictures of their sketches and upload them to Build directly using their phone. It made the image uploading process quicker.

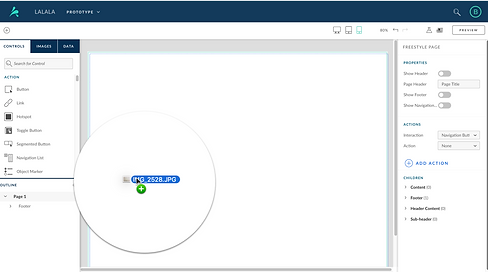
2. Defining hotspot and navigation? Should be easy!
Users could directly draw the hotspots on the images and use the cursor to define the navigation. We also provided two separate ways for them to modify the navigations.


3. Changing the layout and image editing? Should be smooth!
I made the changes based on the usability testing results.

Reorder
Users can now drag pages in between other pages to reorder.

Replace
Dragging one image on top of the existing page will trigger the replacement of that page

Zoom
The new design helps users to focus on the content they want.

Image editing
Image editing mode allows users to crop, rotate images, and remove the background noise of the images.
LONG-TERM VISION
Explore machine learning possibilities
The stakeholders didn't plan to implement designs beyond image editing. However, I didn’t stop here, satisfied. There was a critical problem that we had not solved: how to make the smooth transition from a low-fidelity prototype to a hi-fidelity prototype.
BUILD should be able to recognize users’ low-fidelity sketches and turn them into hi-fidelity pages accordingly. BUILD it should help choose the right page type, identify the controls that users want and set navigations based on the image prototype.


At the same time, users have the freedom to switch the auto-selected controls to others if they want.
Long-term vision
During the design stage, our colleague Gaby was leading the POC for the new exploration. We shared the design with stakeholders as well as BUILD internal users.
1. The demand was huge
After we shared it with internal users, everyone was asking when he or she could get this.
2. Lack of data was the challenge
To be able to recognize one control, we need hundreds and thousands of drawings from multiple people. Our team currently didn’t have that mechanism.
Even though the product team didn't add the design to the release plan, the value of the design was proven through the POC. The proposal was defined as the long-term vision of the rapid prototyping project.
The impact
Faster working process
With the new design, we have greatly simplified the process of creating low-fidelity prototypes in BUILD which saved 70% of the working time (from 120secs to 30secs for prototyping with three pages).
No gap
With the release of the new rapid prototyping tool, BUILD finally supports low-fidelity prototyping successfully. The new design has closed the gap between what users learn and what they can do in BUILD, which has taken one more step towards streamlining the design-thinking process.
Stronger customer loyalty
BUILD is now frequently referenced as an excellent tool for image prototyping. The new design has not only attracted new users to BUILD but has also increased the existing user stickiness.
My reflection
Making an assumption is fine, proving it is the key
During the design stage, it's OK and necessary to make assumptions. However, the key is to use user research as a tool to help you prove whether the assumption is right or wrong.